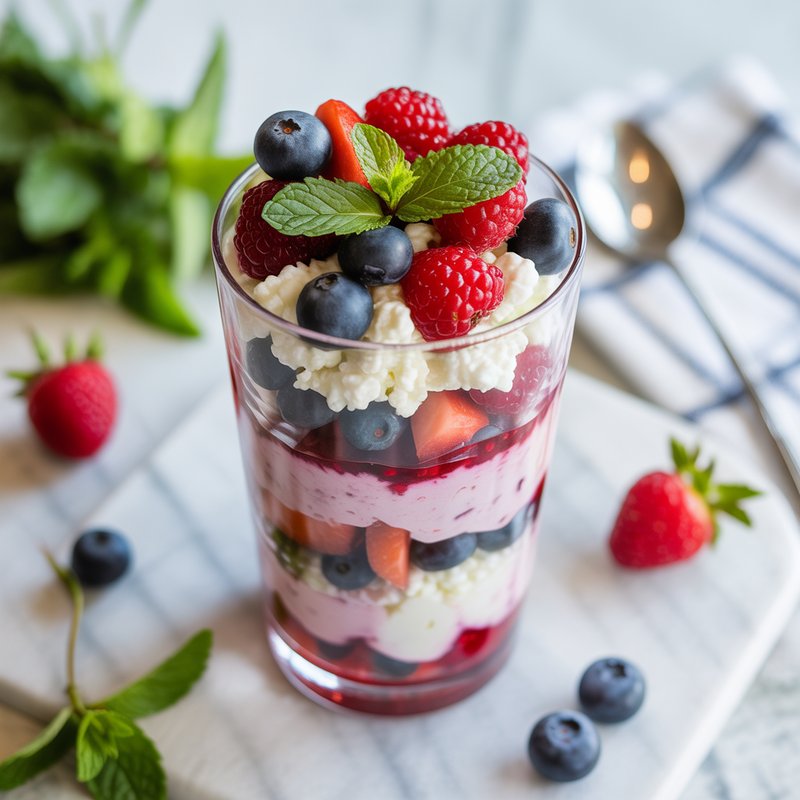
If you’ve ever stared down a slice of cheesecake and thought, I love you, but I don’t love the aftermath, this is your dessert. It eats like the classic New York style version, holds its structure, and gives you protein you can count on. The secret isn’t much of a secret anymore: cottage cheese. Treated right, it bakes into a creamy, tangy custard with clean slices and no chalky aftertaste. Treated poorly, it can be grainy, rubbery, or oddly salty.
I’ve baked a lot of these for clients who track macros, and for friends who just want something satisfying at the end of the day without blowing up their totals. What follows is the version that consistently works in a home kitchen, plus the small adjustments that make it yours.
What makes this cheesecake “high protein” without tasting like it
Cottage cheese does a few jobs at once. It brings casein-rich protein with a mild tang that plays well with vanilla and lemon. When you blitz it long enough, it behaves like a richer dairy, especially if you support it with Greek yogurt and eggs. Unlike protein powder desserts, there’s no dustiness. Unlike full-cream cheese cakes, you don’t need a pound and a half of bricks to get body.
The practical wrinkle is water. Cottage cheese carries more whey than cream cheese, so you have to control moisture or you’ll get curdled pockets or a soft, weepy center. That’s fixable with blending, a little starch, and patience in the cool-down. If you can give it time, this dessert rewards you.
The classic profile we’re aiming for
Before we get into the how, it helps to name the target. You’re not making a no-bake pie, and you’re not making a “healthy-tasting” dessert. The goal is:
- A crisp but not rock-hard crust, slightly salty-sweet, buttery, and cohesive when cut. A smooth, velvety filling that sets cleanly, with a faint tang, balanced sweetness, and zero grain. A top that’s pale with minimal cracking, no rubbery ring around the edge, and slices that hold when you lift them with a server.
That’s the bar. We’ll clear it.
The recipe: cottage cheese high-protein cheesecake, classic style
This yields one 9 inch cheesecake, about 12 slices. You’ll need a 9 inch springform pan, a blender, and either a large roasting pan for a water bath or a low-and-slow bake plan. The water bath is safer if you want a perfectly smooth top and even texture. If you don’t have the setup or don’t want to fuss, you can still get a great result by controlling oven temp and resting.
Ingredients
For the crust
- 150 g (about 1.5 cups) finely crushed graham crackers or digestive biscuits 45 g (3 tablespoons) unsalted butter, melted 15 g (1 tablespoon) neutral oil, such as grapeseed or light olive oil 20 g (about 1.5 tablespoons) granulated sugar Pinch of fine salt
For the filling
- 600 g full-fat cottage cheese (look for 4 percent milkfat; avoid “no salt added” unless you compensate) 225 g full-fat Greek yogurt (about 1 cup) 120 g granulated sugar (about 1/2 cup plus 2 tablespoons), adjust to taste 3 large eggs, room temperature 15 g cornstarch (about 1.5 tablespoons) 10 g pure vanilla extract (2 teaspoons) Zest of 1 medium lemon, optional but recommended 2 teaspoons fresh lemon juice, optional for brightness Pinch of fine salt
For the pan
- Butter or spray for greasing Heavy-duty aluminum foil if using a water bath
Why these choices: full-fat dairy makes a noticeable difference in texture. You’ll still come out ahead on macros compared with a traditional cheesecake because you’re swapping a lot of cream cheese for higher-protein cottage cheese and yogurt. If you use 2 percent products, it will still work, but plan on a slightly looser set and a bit less silk on the palate.
Method, with the why behind each step
Prepare the pan. Lightly grease your springform, then line the bottom with a circle of parchment. If you’re using a water bath, wrap the outside of the pan with a double layer of heavy-duty foil, extending up the sides. Even “leakproof” pans sometimes weep under pressure. The foil is cheap insurance.
Heat the oven to 350°F (175°C). We’ll par-bake the crust, then lower the temperature for the custard.
Mix the crust. Stir together the crumbs, melted butter, oil, sugar, and salt. It should feel like damp sand that clumps when squeezed. The oil keeps the crust snappy after chilling, a small trick that matters on day two and three.
Pack and bake the crust. Press the mixture into the pan, building a slight lip around the edge, 1 to 1.5 inches up the sides if you like a more traditional look. Try to keep thickness even so it bakes uniformly. Bake for 9 to 11 minutes until fragrant and just starting to take color. Cool on a rack while you blend the filling, and lower the oven to 300°F (150°C).
Blend the cottage cheese until perfectly smooth. This is the non-negotiable step. Add the cottage cheese to a high-speed blender and run it for 60 to 90 seconds, scraping once, until it looks like thick yogurt with zero visible curds. If your blender struggles, pulse first to break the curds, then blend continuous. This one step determines whether your cheesecake eats creamy or sandy.
Build the filling. To the blended cottage cheese, add Greek yogurt, sugar, cornstarch, vanilla, lemon zest, lemon juice if using, and salt. Blend again just to combine fully, 20 to 30 seconds. Add the eggs last, blending on low or pulsing 5 to 8 times just until incorporated. Over-blending eggs introduces excess air, which can lead to puffing and cracking. If you see bubbles, tap the container on the counter several times to bring them up.
Pour and smooth. Pour the filling into the cooled crust. If you see surface bubbles, use an offset spatula to nudge them to the edge, or pass a kitchen torch lightly over the top to pop them. Not essential, helpful.
Choose your bake method. If using a water bath, set the wrapped pan in a roasting pan, place on the oven rack, and pour hot water into the outer pan until it reaches halfway up the sides of the springform. If not using a bath, have an empty sheet pan on the lower rack and pour a cup of hot water onto it to create a more humid environment.
Bake at 300°F until just set. You’re looking for a center that wobbles like Jell-O, not ripples like a liquid. For most ovens, that’s 55 to 70 minutes in a bath, or 65 to 80 minutes without one. The edges will look matte, the center will still jiggle a couple inches across when nudged. If you use an instant-read thermometer, pull it when the middle reads 150 to 155°F. That gives you carryover to land around 160°F, which sets the proteins without squeezing out moisture.
Cool patiently. Turn off the oven, crack the door with a wooden spoon, and let the cheesecake rest inside for 45 minutes. Transfer to a rack and let it cool at room temperature another 60 to 90 minutes. Run a thin knife around the rim to release the sides as it cools, which helps prevent cracking. Chill uncovered for an hour, then cover loosely and refrigerate at least 6 hours, ideally overnight. Texture improves noticeably on day two.
Slice with care. Dip a sharp knife in hot water and wipe it clean between cuts. It’s fussy for 30 seconds and saves you a ragged slice.
Flavor, sweetness, and protein notes
As written, the cheesecake lands lightly sweet, not bakery-level. If you prefer a sweeter finish, add 20 to 30 g more sugar without affecting set. If you track macros, a slice in the 1/12 range will usually land around 12 to 16 g protein, depending on your cottage cheese brand and yogurt choice. If you swap in reduced-fat dairy, protein will tick up a little, but texture softens. It’s a tradeoff.
If you need higher protein without more sugar, you can replace 60 g of the yogurt with plain, unsweetened skyr or strained Greek yogurt to concentrate casein. I don’t recommend adding whey protein powder to the batter here. Whey behaves poorly under heat in custards, clumping or creating a mealy bite. Casein-rich dairy gives you a smoother outcome.
A quick scenario: weeknight baker, next-day payoff
You finish dinner at 7:30, want dessert for a lunch with friends tomorrow, and only have a basic blender. You can still make this work. Blend the cottage cheese longer than feels necessary, scraping frequently. Take the bake to the lower end of time with a water bath, and don’t rush the cool. Move it to the fridge by 10:15. Next day, bring it to the counter 20 minutes before slicing so the fat softens slightly and the flavor opens up. This is how you get a cheesecake that reads as classic even when you swap the usual suspects.
Troubleshooting: what usually goes wrong and how to fix it
Cracks across the top. Two main culprits: too much air or thermal shock. If your batter looked foamy, you blended the eggs too enthusiastically. Go gentler next time. If the top dried out or the oven ran hot, it likely pulled apart as it cooled. A water bath or a pan of water on the lower rack helps buffer heat, and releasing the sides with a knife during cool-down reduces stress. If you do end up with cracks, a thin sour cream topping can hide them: whisk 180 g sour cream with 2 tablespoons sugar and 1 teaspoon vanilla, spread on the warm cheesecake 10 minutes after it leaves the oven, and bake another 5 minutes just to set the sheen.
Grainy interior. This is almost always under-blended cottage cheese or curdling from overbaking. Blend until absolutely smooth, and trust the jiggle test or thermometer range. Remember, it firms as it chills.
Weeping or a wet crust. If water got into your springform during the bath, your foil wrap failed. Use heavy-duty foil and a tight double layer. If you skipped the bath, your crust might be absorbing moisture from the filling. Par-bake long enough to toast the crumbs, and don’t skimp on the fat in the crust.
Rubbery edges. Overbaked perimeter. Check earlier next time, or use a bath. You can also tent a loose ring of foil around the rim for the last 15 minutes if you know your oven has hot spots.
Salty tang you didn’t expect. Cottage cheese brands vary in sodium. Taste your blended cottage cheese before adding sugar and salt. If it reads salty, skip the pinch of salt and lean toward the higher end of sugar.
The boring, useful oven talk
Ovens lie. A dial says 300°F, the cavity runs 325°F on the right and 285°F on the left. For custards, that variance matters. If your bakes are unpredictable, a $15 oven thermometer saves desserts. Positioning helps too. Middle rack gives even air flow. Glass doors can radiate extra heat in tiny kitchens; if your unit lives next to a sunny window or a tight cabinet, rotating the pan once at the midpoint can even things out. Rotate with care, gently, to avoid sloshing the center.
Convection is a mixed bag. Fan-forced heat can dry custards. If convection is your only option, drop the set point by 20 to 25°F and monitor early.
Choosing the right cottage cheese
This is where brand actually matters. You want small curds, full fat, and no stabilizers if possible. Some stabilizers can create a subtle gummy texture when baked. If all you can find has gums, you can still get an excellent cheesecake, but give yourself extra blending time and consider straining the cottage cheese for 30 minutes through a fine mesh sieve to pull off some whey.
If the only option on the shelf is 2 percent or fat free, the recipe still works, but you’ll want to keep the Greek yogurt full fat, or add a tablespoon of melted butter to the filling to help mouthfeel. Same bake, slightly longer chill.
How sweeteners swap, and where they don’t
Sugar does more than sweeten. It helps control coagulation and gives gloss. If you use a granulated sugar substitute, pick one that measures 1:1 and has some bulk. Allulose works cleanly in custards, but it browns faster; monitor your crust and tent if needed. Erythritol can recrystallize and feel cool on the tongue after chilling, which is distracting in a creamy dessert. If you mix allulose and a little erythritol, you can balance sweetness and reduce browning. Honey works, but introduces water; if you go that route, reduce the yogurt by 15 to 20 g and increase cornstarch by a teaspoon.
Water bath vs no bath: when each makes sense
If you need a pristine top and ultra-smooth texture, use the bath. It narrows the margin for error and gives you that consistent creaminess edge to center. If you’re in a tiny apartment with a shallow oven and no roasting pan, skip it and use the humidity trick with a sheet pan of water. Lower the oven to 290 to 295°F and plan on a longer bake. You’ll end up with a faintly more rustic surface, but the interior can still be excellent.
One more practical note: a silicone pan wrap (market versions that sleeve a springform) beats foil on leak prevention. If you bake a lot, they’re worth owning.
Variations that keep the classic feel
It’s easy to overdress this dessert. The base recipe has a friendly backbone, so keep changes focused.
- Lemon classic: Add the zest of a second lemon and 2 tablespoons lemon juice to the filling, and serve with quick macerated berries. Reduce sugar by 10 g if your berries are very sweet. Espresso stripe: Dissolve 1 tablespoon instant espresso in 1 tablespoon hot water, cool, and swirl through the batter after pouring. Don’t fully blend it in, you want ribbons. Vanilla bean: Split a vanilla bean and scrape into the batter, then add 1 teaspoon extract as well. Small change, big aroma. Chocolate cap: After chilling, top with a thin ganache made from 120 g dark chocolate and 120 g warm 2 percent milk. Chill 30 minutes to set before slicing.
These all keep the structure intact and won’t fight the cottage cheese base.
Serving notes and storage
Cheesecake tastes best slightly cool, not refrigerator-cold. Pull it from the fridge 20 to 30 minutes before serving. The flavor opens and the fat softens, giving you a cleaner bite.
It holds for 4 days covered in the fridge. For the cleanest crust, store without heavy plastic pressed onto the top; condensation will soften the crumb at the edges. If you want to freeze, cool completely, chill overnight, then freeze whole and unsliced, tightly wrapped. Thaw in the fridge, unwrapped after the first hour to prevent condensation buildup. Texture remains surprisingly good for up to a month.
If you’re batch cooking for a week, slice and wrap individual portions after the overnight chill. They thaw in 30 to 45 minutes at room temp, helpful for a post-workout snack you actually look forward to.
Small professional moves that raise your odds
- Strain the batter through a fine mesh sieve into the crust if your blender is underpowered. Removes any stubborn curd bits and catches bubbles. Warm your dairy. Ice-cold eggs and yogurt lengthen bake time and encourage cracks. Room temperature ingredients set more evenly. Taste before you commit. After blending the cottage cheese, take a small spoonful. If it tastes even slightly salty, adjust sugar or skip the added salt. That 10 second taste saves a batch. Reserve a tablespoon of crumb mix. If a crack shows up, crumble it over the slice and call it texture. Nobody complains about extra crust.
When to say “it depends” and how to decide
Should you use reduced-fat dairy? It depends on your goal. If protein per slice is king and you’re comfortable with a slightly lighter texture, 2 percent cottage cheese and full-fat yogurt are a strong compromise. If texture is king and you still want meaningful protein, full-fat cottage cheese and yogurt give the most classic result, still far leaner than a cream-cheese heavy version.
Bath or no bath? If your oven runs hot or you’ve seen dramatic top browning before, use the bath. If your oven is well-behaved and you dislike handling hot water, skip the bath and hedge by baking at 295°F longer, then resting carefully.
Crust or crustless? For strict macro tracking, a crustless version works. Butter a pan, dust lightly with fine crumbs or almond flour, and bake the filling directly. You’ll shave off carbs and fat from the base but give up that crunch contrast. If you eat with your eyes and ears, the quiet crackle from a crust matters.
A macro-minded snapshot
If you’re the person with a food scale on your counter, here’s a reasonable range for this recipe with full-fat cottage cheese and yogurt, using standard US brands. For 12 slices, expect roughly 220 to 260 calories per slice, 12 to 16 g protein, 12 to 16 g fat, and 14 to 18 g carbs. Swap 2 percent cottage cheese and you’ll bring fat down a bit and nudge protein up by 1 to 2 g per slice, usually at a small cost to texture. Brands swing these numbers, so check your labels and tally with what’s in your fridge.
If you only remember three things
Blend the cottage cheese until it’s absolutely smooth. Keep the oven temperature honest and the bake gentle. Let it cool slowly, then chill overnight. Those three choices do more heavy lifting than any tweak to sugar, starch, or zest.
The https://squareblogs.net/morganwulk/cottage-cheese-protein-bread-recipe-with-egg-whites rest is style. Whether you go with a faint lemon note, a more assertive vanilla, or a slick of chocolate on top, this cheesecake gives you the pleasure of a classic slice with enough protein to make it more than a splurge. It respects your macros and your palate, which is the rare combination we all keep trying to find.
And if someone at the table asks what makes it so creamy, you can smile and say, cottage cheese, then watch the skepticism melt after the first bite.